Essential phone repair tools for DIY fixes are your ticket to saving serious cash and mastering your phone’s inner workings. Learning the ropes of DIY phone repairs isn’t just about cost-savings; it’s a journey into understanding the intricate mechanisms that power your tech. This guide dives deep into the crucial tools, safety precautions, and troubleshooting techniques that’ll turn you into a confident, capable phone repair whiz.
From understanding the basic tools to tackling more advanced repairs, this comprehensive guide equips you with the knowledge and resources to confidently take on your next phone repair project. Safety is paramount, and we’ll cover essential precautions to ensure you work with confidence and prevent potential mishaps. Get ready to unlock a whole new level of tech mastery!
Introduction to DIY Phone Repair
Cracked screen? Dead battery? Instead of shelling out for pricey repairs, why not give DIY phone repair a try? It’s surprisingly accessible, and can save you a significant amount of money, especially if you’re dealing with common issues. However, it’s crucial to approach this with caution and awareness of the potential risks. This guide will walk you through the benefits, safety considerations, and the types of repairs often undertaken by DIY enthusiasts, along with the necessary tools.
DIY phone repair offers significant financial savings compared to professional services. Furthermore, it allows you to gain a deeper understanding of your device’s inner workings. However, it’s important to recognize the inherent risks involved, including potential damage to your phone or personal injury. Always prioritize safety, and if you’re unsure about any aspect of the repair process, it’s always best to seek professional help.
Safety Precautions for DIY Phone Repair
Working with electronic devices requires strict adherence to safety protocols. Improper handling can lead to electrical shocks, damage to the device, or even injury. It’s essential to establish a safe workspace and ensure the proper tools and techniques are used. Always disconnect the device’s battery before starting any repair.
Common DIY Phone Repairs
DIY phone repairs frequently involve common issues such as screen replacements, battery replacements, and charging port fixes. These repairs often involve disassembling the phone, carefully handling delicate components, and precise reassembly. Careful planning and execution are critical to avoid damaging the phone’s internal mechanisms.
Essential Phone Repair Tools
A well-equipped toolkit is crucial for successful DIY phone repairs. Here’s a list of commonly used tools:
- Spudger: A plastic or metal tool used to pry open the phone’s casing and gently separate components. It’s important to choose a spudger with a rounded tip to avoid scratching the phone’s sensitive surfaces. A flat-blade spudger can be used to pry components apart.
- Phillips and Flathead Screwdrivers: Essential for removing screws holding the phone’s internal components together. Always use the correct size screwdriver to avoid stripping the screws. Different phone models have different screw sizes, so it’s essential to identify the correct size before beginning the repair.
- Tweezers: For handling small components and ensuring precise placement. Fine-tipped tweezers are essential for delicate tasks, like removing small screws and placing tiny components.
- Heat Gun: Useful for softening adhesive bonds to facilitate the removal of components, such as screens and batteries. Always use caution when using a heat gun to avoid burning yourself or the phone.
- Anti-static wrist strap: A vital tool to prevent static electricity from damaging the phone’s sensitive components. It’s especially important when handling delicate electronic components.
Tools for Component Replacement
DIY phone repair can be a rewarding experience, but it’s crucial to approach it with the right tools. Improper tools can lead to irreversible damage, rendering your phone unusable. This section dives deep into the specific tools needed for replacing various components, emphasizing safety and proper technique.
Component replacement requires precision and care. Understanding the specific tools for each task is essential to avoid damaging the delicate components within your phone. Knowing how to safely remove and install parts, combined with the ability to identify damaged components, significantly increases your chances of a successful repair. The choice of tools also depends heavily on the phone model, so careful consideration is vital.
Identifying Damaged Components
Visual inspection is often the first step in identifying damaged components. Look for physical damage like cracks, dents, or discoloration. Pay attention to any unusual sounds or behavior from the phone, such as erratic charging, display issues, or unresponsive buttons. In some cases, a thorough diagnostic process might be necessary, which involves checking the phone’s functionality. For example, a faulty charging port might not just exhibit a lack of charging; it could also cause overheating.
Tools for Screen Replacement
Screen replacements often require specialized tools. A spudger is a crucial tool for prying open the phone’s casing and separating the adhesive holding the screen. A suction cup, carefully applied to the screen, provides a secure grip during the removal process. Static cling is also important to prevent damage to the screen’s delicate internal layers. A set of precision screwdrivers, designed for delicate components, is essential for disassembling the phone.
Tools for Battery Replacement
Battery replacement typically requires a set of screwdrivers and a specialized battery removal tool. These tools ensure that the battery is carefully and safely removed without damaging the phone’s internal components. Always ensure that the battery is fully discharged before handling. Properly selecting a tool is essential; improper force can damage the battery terminals or the phone’s housing.
Tools for Logic Board Repair
Repairing the logic board requires the most meticulous attention to detail. A magnifying glass and a set of extremely fine-tipped screwdrivers are vital. The logic board is the central processing unit of the phone. It controls virtually all functions and is often a complex arrangement of intricate components. Using the correct tools minimizes the risk of damaging the delicate components. Always ensure that the phone is properly discharged before handling the logic board.
Selecting Tools Based on Phone Model
Different phone models have varying internal structures. Always refer to the specific repair guide for your phone model. This guide will Artikel the precise tools and procedures for a successful repair. For example, an older phone model might use different screws and adhesive types compared to a newer model. Understanding the differences between models is crucial for effective DIY repairs.
Safety Considerations
DIY phone repairs can be a rewarding experience, but safety is paramount. Ignoring safety precautions can lead to serious injuries or irreversible damage to your phone. This section Artikels crucial safety measures to ensure a smooth and safe repair process. Following these guidelines will not only protect you but also increase the chances of a successful repair.
Grounding and Static Electricity Prevention
Static electricity can be a major culprit in damaging sensitive electronic components during repairs. Discharging static electricity before handling components prevents accidental damage. This is crucial for preventing short circuits and other electrical issues. Always ensure you’re grounded before touching any components. A simple method involves touching a grounded metal object, like a radiator or a water pipe, to dissipate static charge.
Potential Dangers of Incorrect Tool Use
Using the wrong tools or applying excessive force can lead to component damage or personal injury. Incorrect tool use can also cause irreparable damage to your phone’s delicate internal circuitry. Choose tools specifically designed for phone repairs, and always use them correctly. This includes using appropriate pressure and torque when applying screws or disassembling components. Avoid using tools that are damaged or worn out, as this can increase the risk of breakage or accidents.
Safety Guidelines for Handling Electronic Components
Handling electronic components requires careful attention to detail. Components are often fragile and easily damaged. Always handle components with clean hands and a lint-free cloth to prevent dust or dirt from adhering to them. Avoid touching the delicate pins or leads of components directly with your fingers. Use tweezers or other appropriate tools to manipulate components. This helps preserve the integrity of the components and increases the likelihood of a successful repair.
Steps to Take in Case of a Mishap or Injury
Accidents can happen. In the event of a mishap, prioritize your safety and well-being. If you experience any injury, such as cuts or burns, immediately seek medical attention. Similarly, if your phone suffers severe damage, refrain from further attempts at repair. Instead, contact a professional repair technician. This minimizes the risk of additional harm and ensures a safe and effective solution.
First Aid for Common Repair Injuries
Small cuts or scrapes are common during phone repairs. First aid kits with antiseptic wipes and bandages should be readily available. A simple antiseptic wash, followed by a bandage, can help prevent infections. Burns from soldering or static discharge should be treated as serious burns. Immediate cooling with cool water is important, followed by consultation with a medical professional.
Tool Selection and Maintenance: Essential Phone Repair Tools For DIY Fixes
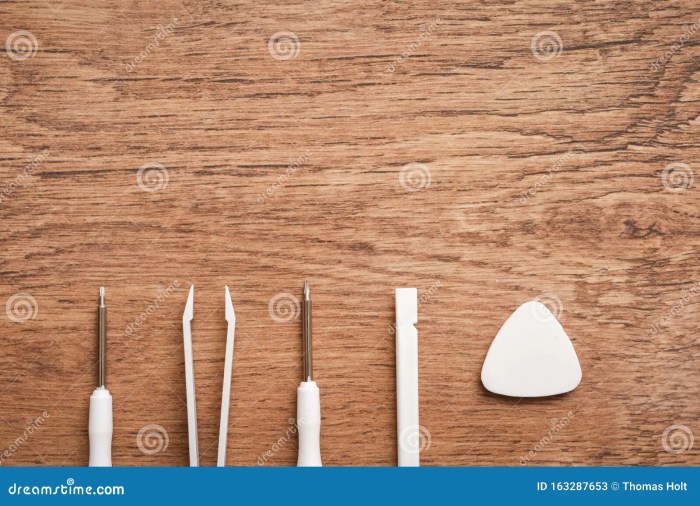
Source: dreamstime.com
Need to fix your phone yourself? Essential tools are key for successful DIY repairs. But, have you considered how smart home devices like smart thermostats and lighting systems can also automate your living space? Smart home devices to automate your living space offer a whole new level of convenience, but getting started with those can be daunting.
Ultimately, knowing the right phone repair tools can save you a ton of cash, especially when dealing with a cracked screen or a dead battery.
Picking the right tools for your phone repair journey is crucial. A poorly chosen tool can damage your phone, waste your time, and potentially lead to frustrating results. Knowing the specifics of your phone model and the tools’ capabilities is key to successful DIY repairs. Maintenance is equally important, ensuring your tools remain sharp, precise, and ready for the next project. Proper care extends the life of your tools, saving you money in the long run.
Brand and Model Comparison
Choosing the right brand and model of repair tools can significantly impact the success and safety of your phone repair projects. Different brands and models offer varying levels of precision, durability, and features. Understanding these differences is essential for selecting the best tools for your needs.
| Brand | Model | Features | Price | Durability |
|---|---|---|---|---|
| Wera | Precision Screwdriver Set | High precision, ergonomic design | $50-$150 | Excellent |
| Klein Tools | Pliers Set | Durable construction, various sizes | $25-$75 | Good |
| iFixit | Phone Repair Kit | Includes various specialized tools | $30-$100 | Good |
Maintenance Procedures
Regular maintenance is vital for preserving the integrity and efficiency of your tools. Following proper procedures ensures they remain in optimal condition, increasing their lifespan and reliability.
- Cleaning: Thoroughly clean tools after each use, removing any debris, dust, or adhesive residue. Use compressed air or a soft brush to remove particles. Never use harsh chemicals or solvents.
- Sharpening: Sharpen blades, cutters, and other sharp tools as needed. Use appropriate sharpening tools for each type of tool.
- Lubrication: Lubricate moving parts with appropriate lubricant to ensure smooth operation. Use a high-quality lubricant, such as lithium grease, on moving parts of screwdrivers and pliers.
- Storage: Store tools in a dry, clean place to prevent corrosion and damage. Consider using tool organizers or cases to prevent tools from getting lost or colliding with each other.
Tool Inspection and Cleaning
Regular inspection is essential to identify any signs of damage or wear and tear. This proactive approach prevents unexpected tool failure during a repair, ensuring the safety and quality of your work.
- Visual Inspection: Examine tools for cracks, chips, or bent parts. Even small imperfections can compromise the tool’s integrity.
- Functionality Test: Ensure tools operate as intended. Test screwdrivers to confirm they grip and turn screws without slipping or breaking. Test pliers to ensure proper grip and cutting power.
- Cleaning Frequency: Clean tools after each use or at least weekly to prevent build-up of contaminants. Proper cleaning prevents corrosion and ensures smooth operation.
Selecting Tools for Specific Phone Models
Consider the phone model’s design and internal components when choosing tools. Different models have varying levels of complexity, necessitating specific tools for disassembly and reassembly.
- Component Size and Shape: Some phones have smaller screws or unique component layouts. Select tools with appropriate sizes and shapes to avoid damage.
- Material Composition: Different phone components might have different materials. Understand the materials to select tools that won’t damage or scratch the components during disassembly.
- Special Tool Requirements: Some phones require specific tools, such as suction cups or plastic opening tools, to safely remove the phone’s casing. Research these requirements for your specific model.
Tool Lifespan and Wear
Tool lifespan and potential wear depend on the material, construction, and frequency of use. Regular maintenance and careful handling significantly impact tool longevity.
| Tool Type | Lifespan (Approximate) | Potential Wear | Maintenance Considerations |
|---|---|---|---|
| Screwdrivers | 3-5 years | Blade wear, handle damage | Regular sharpening, handle inspection |
| Pliers | 5-7 years | Jaw wear, handle damage | Regular lubrication, jaw inspection |
| Spudgers | 2-3 years | Tip breakage, grip wear | Regular inspection, proper storage |
Troubleshooting Common Issues

Source: howtogeekimages.com
DIY phone repairs can be incredibly rewarding, but sometimes things don’t go as planned. It’s crucial to understand the common pitfalls and have a troubleshooting strategy in place. Knowing how to identify and fix problems quickly can save you time, frustration, and potentially, a damaged phone. This section dives deep into common issues and how to tackle them head-on.
Troubleshooting is an iterative process. If one method doesn’t work, try another. Document your steps meticulously. This record-keeping will be invaluable if you encounter a similar problem in the future. Having a methodical approach will greatly enhance your chances of success.
Common Repair Problems
Understanding the potential issues that can arise during a DIY repair is vital. This allows you to anticipate problems and develop effective solutions. Common problems range from simple connectivity issues to more complex component failures. Careful attention to detail during every step is paramount.
- Connectivity Problems: A phone not charging, or not connecting to the computer or other devices, is a frequent issue. This can stem from faulty charging ports, damaged cables, or incorrect connections within the phone’s circuitry. Thorough inspection and proper troubleshooting procedures are crucial.
- Screen Issues: Cracked screens, unresponsive touchscreens, or distorted displays are common repair challenges. Often, these stem from drops or impacts. Identifying the specific type of damage and the extent of the problem is key.
- Button Malfunctions: Buttons that don’t register, or that stick, can be a frustrating issue. This is often linked to loose or damaged connections within the phone’s assembly, or even issues with the button itself.
- Component Failures: Certain components, like the motherboard or battery, can fail. This can lead to various symptoms, from the phone not turning on to erratic behavior. Careful diagnosis of the symptoms and potential causes is crucial to identifying the exact component at fault.
Troubleshooting Table
This table provides a framework for addressing common DIY phone repair issues.
| Problem | Troubleshooting Steps | Potential Solutions |
|---|---|---|
| Phone won’t turn on | Check power source, battery connections, and charging port. Inspect the motherboard for visible damage. | Replace battery, reseat the battery, repair or replace the charging port, or contact a professional if the motherboard is damaged. |
| Touchscreen unresponsive | Clean the touchscreen, test different input methods (like the physical buttons if available), and verify that the display driver software is functioning correctly. | Cleaning the screen, recalibrating the touchscreen, or potentially replacing the display assembly. |
| Charging issues | Check the cable and wall charger, verify the charging port, and inspect the battery. | Replace the charging cable, check for any loose connections, or replace the battery. |
| Speaker issues | Check for physical obstructions, verify connections, and test different audio sources. | Clean the speaker, replace the speaker if necessary, or look for a loose connection. |
Identifying Damage from Improper Techniques
Improper tools or techniques can lead to various issues. For instance, using excessive force during disassembling can damage delicate components. Using a blunt object or a poorly selected tool can scratch or damage the phone’s case or circuitry. Carefully studying repair guides and following manufacturer recommendations will minimize the risk of damage.
Importance of Proper Technique
Proper technique is paramount to minimizing damage during DIY repairs.
A careful and methodical approach, combined with precision, is key. It’s crucial to use the correct tools for the job and avoid unnecessary force. A damaged component will lead to additional problems. This is a critical step in preventing future issues and maintaining the integrity of the device. Avoid rushing the process. Take your time and work meticulously to prevent further damage.
Advanced Repair Techniques
Diving into the intricate world of phone repairs, advanced techniques unlock the potential for tackling complex issues. This realm goes beyond basic replacements, delving into the heart of the device’s inner workings, demanding a deeper understanding of electronics and precise handling. Mastering these techniques empowers you to tackle more intricate repairs and extend the life of your beloved gadgets.
Specialized Tools for Advanced Repairs
Advanced phone repairs necessitate specialized tools, often exceeding the capabilities of basic repair kits. These tools, such as soldering irons, magnifying glasses, and precise screwdrivers, are crucial for intricate tasks. A well-equipped toolkit includes specific tools for different types of repairs, ensuring the safety and precision of the repair process. For example, a high-quality soldering iron, equipped with a fine tip, is essential for intricate motherboard repairs.
Proper Use of Advanced Tools, Essential phone repair tools for DIY fixes
Safe and effective use of advanced tools is paramount. Soldering irons, for instance, require careful temperature control to avoid damaging sensitive components. Always use appropriate safety precautions, including heat-resistant gloves and eye protection. Incorrect usage can lead to irreversible damage, making precise handling crucial. The proper use of a magnifying glass enhances visibility, crucial for meticulous work on tiny components.
Motherboard Repair Procedures
Motherboard repairs often involve delicate soldering and component replacements. A thorough understanding of circuit diagrams and the phone model’s architecture is essential. Carefully study the circuit board, identifying the faulty component. Using a fine-tipped soldering iron, carefully desolder the faulty component, ensuring no damage to adjacent components. Replace the faulty component with a new, identical part, and re-solder it precisely. The precision of the soldering process is crucial for the motherboard’s functionality.
Specialized Repair Procedures for Different Phone Models
Different phone models have unique architectures and component layouts. Each model requires a specific set of repair procedures. Researching the specific model’s repair guide is crucial to avoid damaging sensitive components. For example, the repair procedure for a Samsung Galaxy S22 Ultra motherboard differs significantly from that of an iPhone 14 Pro Max. Understanding the specifics of each phone model’s design and layout is essential for successful repairs.
Advanced Repair Techniques and Their Applications
- Desoldering: Removing components from a circuit board using a soldering iron and appropriate tools. Desoldering is vital for replacing faulty components, often used in motherboard repairs. Precision in desoldering minimizes the risk of damaging adjacent components. Proper heat control is essential to prevent damage to delicate components.
- Soldering: Joining electronic components using solder and a soldering iron. Soldering is critical for repairing and reassembling components on circuit boards. The right soldering technique ensures reliable connections and avoids overheating. Soldering must be precise to ensure functionality and avoid damaging components.
- Component Replacement: Replacing faulty components with new ones, often on motherboards. This technique is necessary when a component is damaged or malfunctioning. Careful identification of the faulty component and its replacement is vital for a successful repair. Understanding the function of the replaced component ensures the device’s proper operation.
- Troubleshooting with Logic Analyzers: Advanced tools used for analyzing electrical signals within the phone. This can be used to pinpoint specific faults in complex circuits. A logic analyzer allows for detailed observation of electrical signals, helping diagnose issues that might be otherwise difficult to find.
Visual Aids and Examples
Ever wondered what those tiny, seemingly insignificant tools are used for? Unlocking the secrets of phone repair isn’t just about knowing *what* to do, it’s about *how* to do it safely and effectively. Visual aids are your best friend in this journey, allowing you to see the tools in action, and the potential pitfalls you can avoid. Let’s dive in!
Essential Phone Repair Tools
Visual aids are crucial for understanding the various tools needed for successful DIY phone repairs. A clear picture of each tool, along with its description, helps you identify the right tool for the job and prevents costly mistakes.
| Tool Image | Tool Name | Description |
|---|---|---|
| (Imagine a small, precision screwdriver with a flat head) | Flathead Screwdriver | Essential for removing screws, often used for prying open cases and accessing internal components. Choose a size appropriate to the screw type, avoiding damage to the phone. |
| (Imagine a small, precision screwdriver with a pointed tip) | Phillips Head Screwdriver | Used for screws with a cross-shaped head. Like flathead screwdrivers, select the right size to prevent stripping the screw. |
| (Imagine a small, pointed tool with a fine tip) | Spudger | A plastic or metal tool used for prying open phone components, gently separating parts. Avoid using excessive force to prevent damage. |
| (Imagine a small, pointed tool with a flat, wide end) | Tweezers | Used for picking up and handling small components. Precision and gentle handling are key to preventing damage. |
| (Imagine a small, pointed, metal tool with a sharp tip) | Pry Bar (or Opening Tool) | Used for carefully prying apart components that need to be separated, but use with caution. Focus on the correct area to avoid causing damage. |
| (Imagine a magnifying glass with a LED light) | Magnifying Glass | Essential for seeing small components and details clearly. A good light source is vital for accurate work. |
Common Phone Repair Scenarios
Visual examples of common repair scenarios will help you recognize and address potential problems. Understanding how different parts interact is vital to a successful repair.
| Scenario Image | Scenario Description |
|---|---|
| (Imagine a phone with a cracked screen, showing the frame and the area around the broken screen) | Screen Replacement: A visual guide showing the tools and steps involved in removing the damaged screen and installing a new one. |
| (Imagine a phone with a loose or broken charging port) | Charging Port Repair: Illustrating the tools and process for diagnosing and replacing a damaged charging port. |
| (Imagine a phone with a damaged battery) | Battery Replacement: A visual aid showcasing the steps for replacing a damaged or worn-out battery. |
Tool Selection for Different Phone Models
Different phone models may have varying internal configurations and screw types. Knowing this is essential for selecting the right tools.
| Phone Model | Common Tool Types |
|---|---|
| iPhone X Series | Flathead screwdriver, Phillips head screwdriver, spudger, tweezers, pry bar, magnifying glass |
| Samsung Galaxy S20 Series | Flathead screwdriver, Phillips head screwdriver, spudger, tweezers, pry bar, magnifying glass |
| Google Pixel 6 Series | Flathead screwdriver, Phillips head screwdriver, spudger, tweezers, pry bar, magnifying glass |
Safety Precautions
Ensuring safety is paramount during phone repairs. Understanding the potential risks and implementing appropriate safety measures prevents accidents.
| Safety Measure | Importance |
|---|---|
| Using anti-static wrist straps | Preventing static electricity from damaging sensitive components. |
| Working in a well-lit area | Ensuring clear visibility of components. |
| Discharging the phone’s battery completely | Reducing the risk of electric shock. |
| Taking detailed photos and videos before disassembling | Ensuring proper reassembly. |
Wrap-Up
So, whether you’re a seasoned tech enthusiast or a curious beginner, this guide to essential phone repair tools for DIY fixes provides a comprehensive roadmap. We’ve explored the tools, techniques, and safety measures necessary for successful repairs, ensuring you’re well-equipped to tackle any phone repair challenge. Remember, safety first! With the right tools and knowledge, you’ll be fixing your phone like a pro in no time.